
If you’ve ever felt like your dog is your home’s doorman—constantly asking to go in and out—it might be time to give them a bit more freedom. That’s where a doggie door comes in. In this guide, we’ll walk you through how to make a doggie door yourself, helping you save money, improve your pet’s comfort, and maintain control over your home’s entry points.
Installing a doggie door is a manageable DIY project that many homeowners can tackle with the right tools and preparation. Whether you live in a house with a backyard or a small apartment with a balcony, learning how to make a doggie door will make life easier for both you and your furry friend.
Why Install a Doggie Door?
A doggie door offers multiple benefits for both pet and owner:
- Convenience: Your dog can go outside without you having to open the door every time.
- Freedom: Pets enjoy the ability to come and go as they please.
- Reduced Accidents: Fewer indoor accidents when dogs have constant access to the yard.
- Improved Behavior: Dogs with outdoor access tend to be less destructive indoors due to reduced boredom.
Choosing the Right Location for Your Doggie Door
Consider Your Pet’s Daily Routine
The ideal location for a doggie door is based on your pet’s access points. Most commonly, homeowners install the door in:
- A back door leading to a fenced yard
- A garage side door
- A wall with outdoor access
- A sliding glass door (for specialized inserts)
Choose an area where your dog already goes to signal they want to go outside.
Think About Security and Weather
Place the doggie door in a spot that’s not easily visible from the street for added home security. Also consider wind direction, exposure to rain, and insulation. Weatherproof models or wall installations may be more suitable in cold climates.
Tools and Materials You’ll Need
Before starting, gather the following tools and materials:
- Measuring tape
- Pencil or marker
- Jigsaw or reciprocating saw
- Drill and bits
- Screwdriver
- Level
- Doggie door kit (or build your own flap)
- Sandpaper
- Safety goggles and gloves
If you’re creating a custom doggie door without a pre-made kit, you’ll also need:
- Plexiglass or vinyl flap
- Hinges or magnets (for sealing)
- Wooden frame (optional for aesthetics and support)
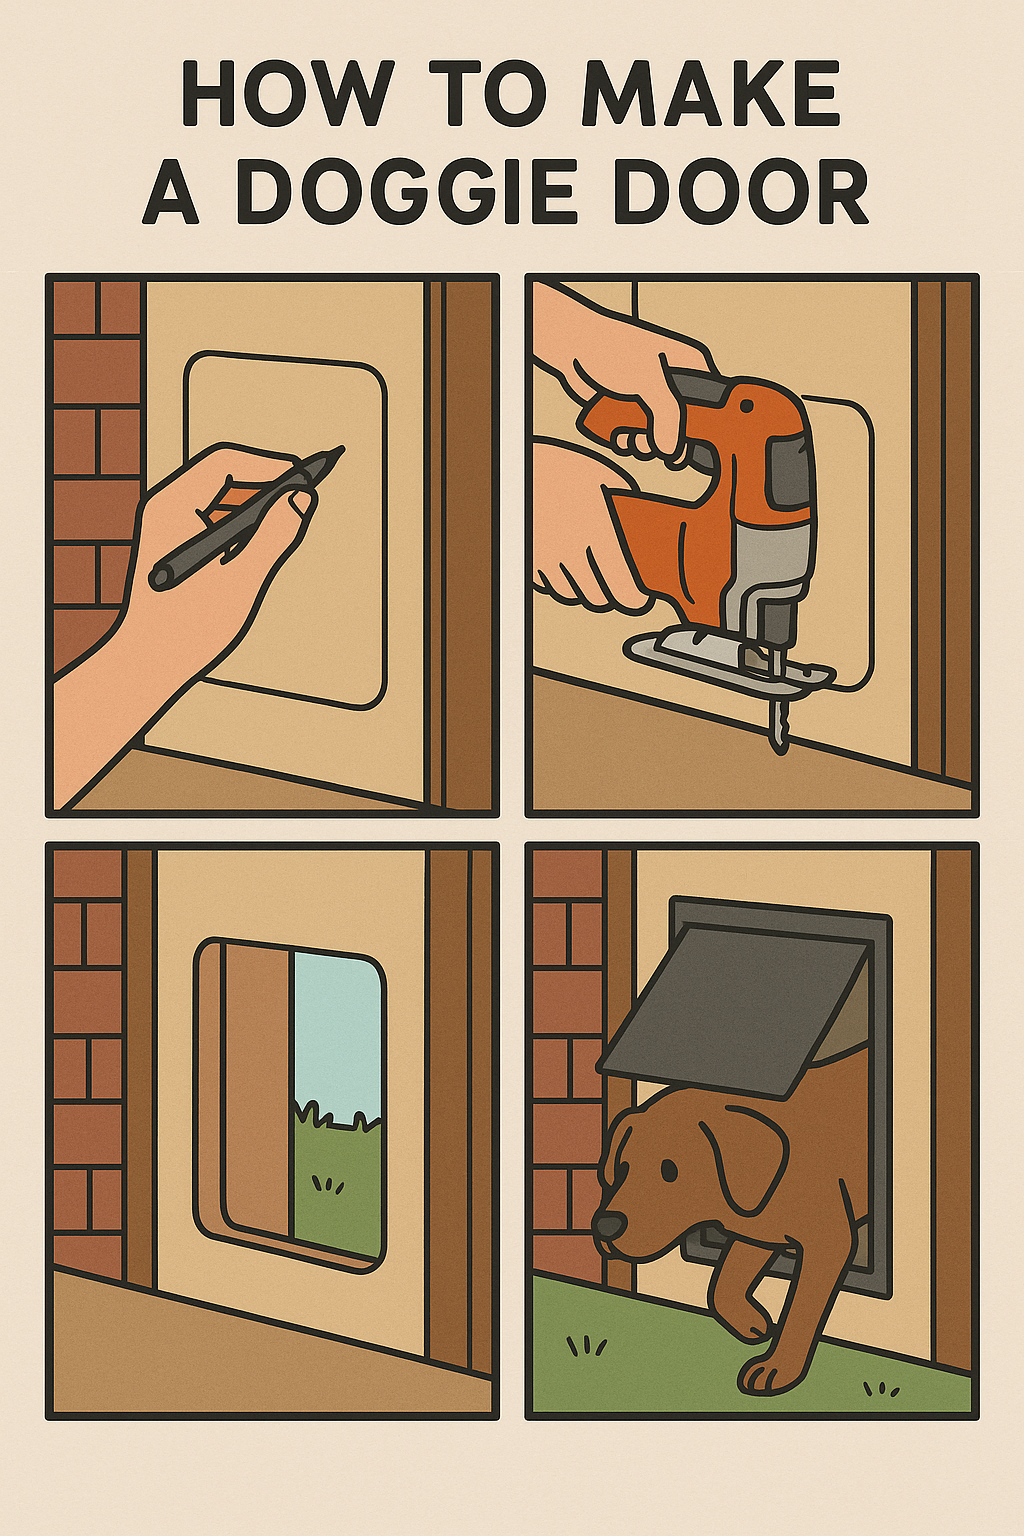
How to Make a Doggie Door: Step-by-Step Instructions
Step 1 – Measure Your Dog
Measure your dog’s width and height from the ground to the top of their shoulders. Add 1–2 inches to both measurements for comfort. This will determine the size of the opening you need to cut.
Tip: Most doggie doors are between 8″x12″ for small breeds and up to 16″x24″ for large dogs.
Step 2 – Mark the Outline
Use your measurements to draw the doggie door’s outline on your chosen door or wall. Double-check that it’s not too close to the door’s edge or frame.
Use a level to ensure your markings are straight.
Step 3 – Drill Guide Holes
At each corner of your outline, drill a hole large enough to fit the jigsaw blade. This allows you to start cutting more easily and get clean edges.
Step 4 – Cut the Opening
Using your jigsaw, carefully follow the outline to cut the opening. Take your time—accuracy matters. Use sandpaper to smooth the rough edges to protect your dog from splinters or cuts.
Step 5 – Attach the Flap or Frame
- If you’re using a doggie door kit, follow the manufacturer’s instructions to attach the flap and frame.
- If you’re making your own flap, attach the flap material (vinyl or plexiglass) at the top of the opening using hinges or flexible plastic.
- For added insulation, you can install magnetic strips at the bottom to help the flap seal.
H3: Step 6 – Test and Train Your Dog
Gently guide your dog through the door with treats and positive reinforcement. It may take a few tries, but most dogs get the hang of it quickly.
Wall vs. Door Installation: Which Is Better?
Door installation is typically easier and cheaper. It doesn’t require cutting through insulation or rerouting wires.
Wall installation, while more complex, allows greater flexibility in placement. It’s ideal if your door location isn’t suitable or you want to maintain your home’s original doors.
Choose based on your home’s layout, your dog’s behavior, and how permanent you want the solution to be.
DIY Doggie Door Safety Tips
- Always wear safety gear when cutting or drilling.
- Double-check that no electrical wiring runs through the section you’re cutting.
- Make sure the door opens smoothly and closes securely to prevent drafts or pest entry.
- Lock the doggie door at night or when you’re away to ensure home security.
Common Mistakes to Avoid
Incorrect Size
One of the most common issues is making the door too small or too large. Always measure your dog accurately and add a margin for comfort.
Poor Weatherproofing
A doggie door that leaks air or water can raise utility bills and cause long-term damage. Use weather stripping or insulated flaps to prevent this.
Insecure Installation
A flimsy flap or weak frame can let in pests or pose security risks. Always double-check all screws and seals.
How Much Does It Cost to Make a Doggie Door?
DIY doggie doors can cost as little as $30–$80 if using simple materials. Kits range from $50–$200, depending on quality and size. Wall-mounted dog doors or smart electronic versions may cost more due to complexity.
Can You Make a Doggie Door Without Cutting?
Yes! There are alternatives like patio panel inserts, window-mounted flaps, or temporary screen door flaps. These are ideal for renters or those hesitant to cut into walls or doors.
Is It Worth Making Your Own Doggie Door?
Absolutely. Learning how to make a doggie door not only saves money but also gives you control over size, style, and placement. It’s a relatively simple project that yields long-term benefits for both pet and owner.
Final Thoughts
Installing a doggie door is one of the most rewarding DIY projects you can take on as a pet owner. It offers daily convenience, improved freedom for your dog, and peace of mind for you. Whether you choose a basic flap or go all-in with a framed, insulated door, the key is careful planning and precise execution.